Documentation version: latest
Colour theme

Many contributors may not be familiar with Git — it can be a confusing world for those new to it, with perplexing terms like clone, fork, branch, merge conflicts, and rebase. This guide provides some background for those new to Git, and also serves as a quick reference for terms and commands used in the SQLFluff contribution workflow.
This section gives some basic background for complete Git newcomers. If you already understand the basics, skip to Recommended way to use Git for SQLFluff.
Git is a distributed version control system. That mouthful basically means it's a way of keeping track of changes to source code — especially when many people are changing various parts of it simultaneously. The distributed part is what makes Git so interesting (and so complicated!): there can be many copies of the code, and keeping them in sync can get complex.
The original copy of a codebase (called a repository or repo) is hosted on a server (e.g. GitHub). People work on copies locally, or may have forked the repo to their own GitHub account — and then cloned that fork locally too. Add in different branches across any of those copies and it can get quite confusing.
GitHub is not Git, but it is one of the most commonly used Git hosting services. The main things GitHub gives you are a Git server to store your code and a nice web interface to manage it. Through the web interface you can view and edit code, raise issues, open and review pull requests, use GitHub Actions to automate tasks, and more.
SQLFluff makes extensive use of GitHub to manage the project and allow contributors to collaborate. Other similar services include GitLab and BitBucket.
GitHub also provides a graphical desktop app called GitHub Desktop — see the GitHub Desktop section for tips.
While it's possible to contribute using only GitHub's website, working locally is much more practical. Git is widely available — see the installation instructions for Windows, Mac, and Linux.
To check if Git is already installed, open a terminal and run:
git --versionIf you see a version number, you're ready. If not:
A Git repository (or repo) is a collection of all the code that makes up a project. The main SQLFluff repo is at https://github.com/sqlfluff/sqlfluff. Additional repos for extensions and tooling are at https://github.com/sqlfluff.
A repo typically contains many branches — independent lines of development where you can work without affecting others. Like a tree, branches diverge from each other, but unlike a tree they are usually merged back when work is complete.
One branch is the primary one (SQLFluff uses main) into which everything is eventually merged. Creating a branch is quick and cheap — Git stores only differences, not full copies. Working in small, focused branches that are merged frequently is the best practice.
Once changes are ready, you open a pull request (PR) — a GitHub feature that creates a structured merge request. A PR has several tabs:
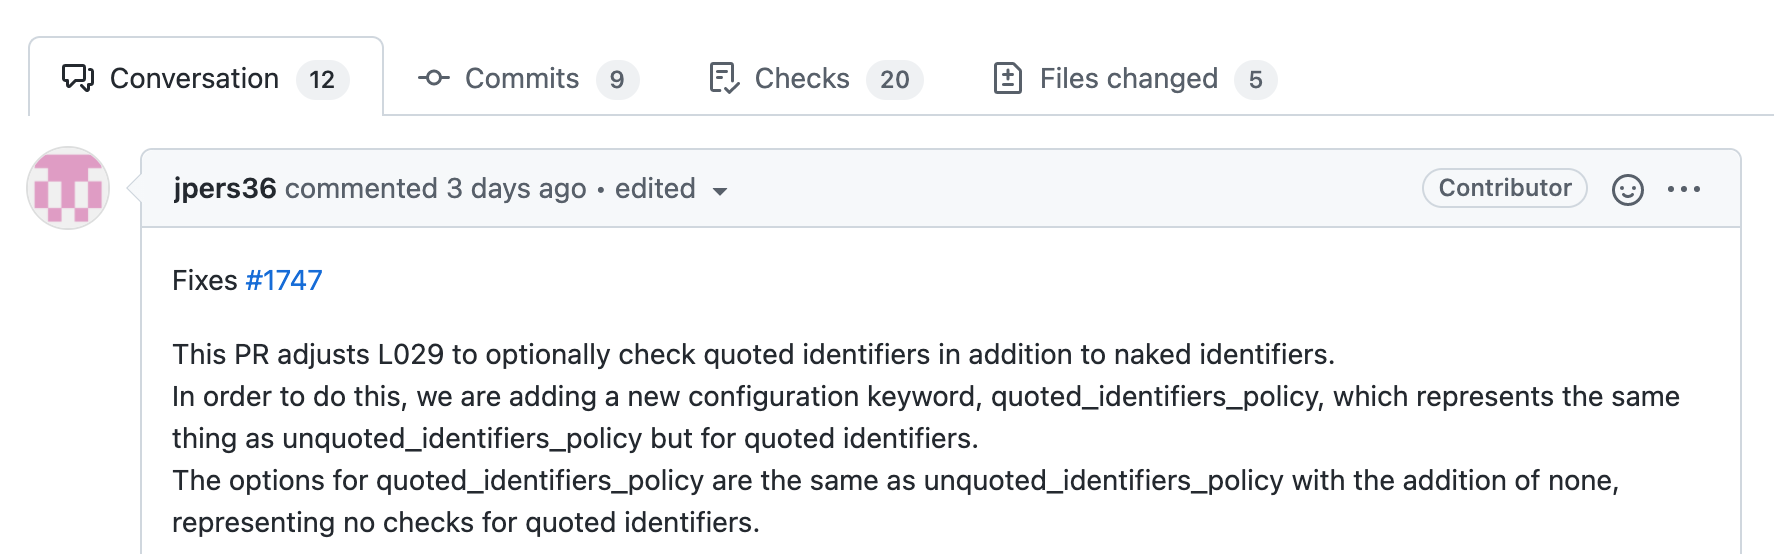
At the bottom of the Conversation tab, when checks pass and the PR is approved, you'll see the merge button:
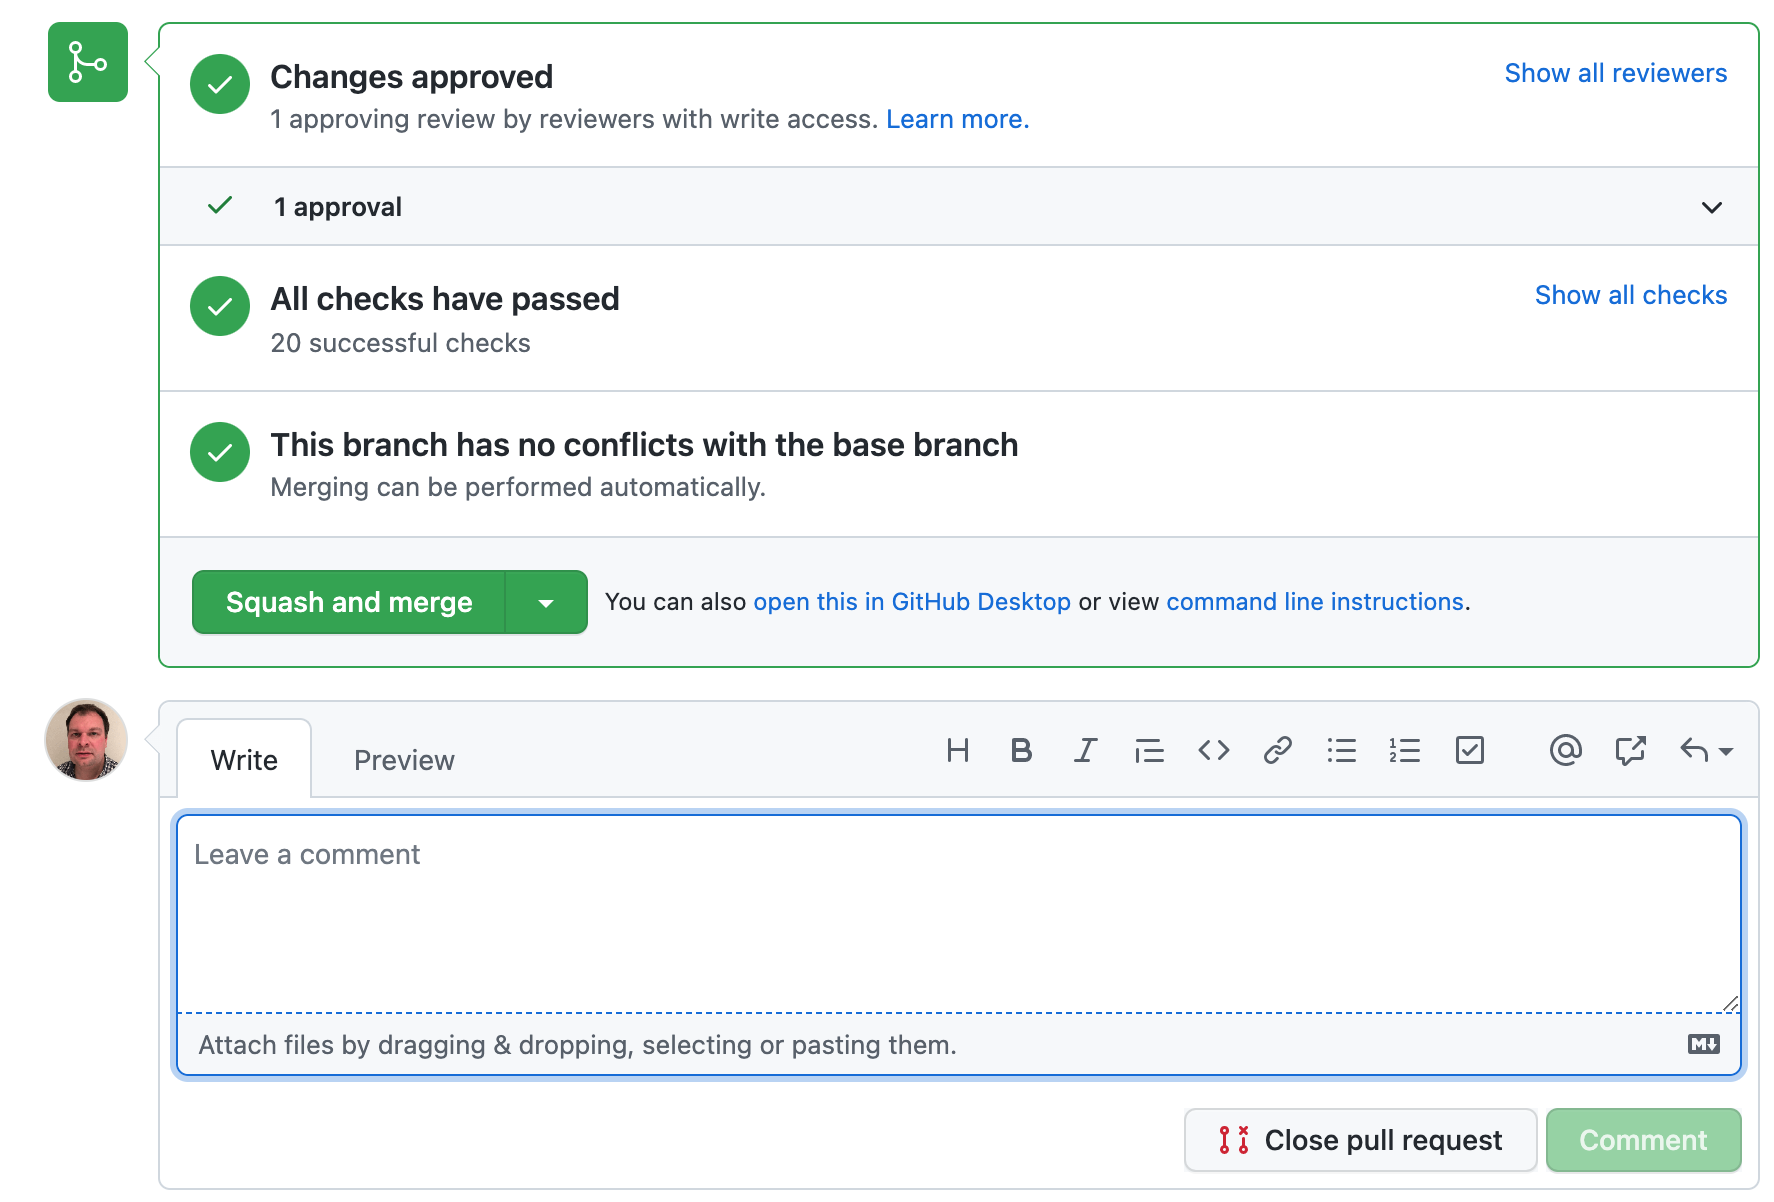
Clicking Squash and Merge merges all commits as one, which keeps the history clean. You do not need to close and reopen a PR when addressing review feedback — simply push changes to the branch and the PR updates automatically.
A fork is a complete copy of a repo in your own GitHub account. You create a branch in your fork, make changes, and then open a PR from your fork back to the original (upstream) repo. Most SQLFluff contributors work this way because only core maintainers can create branches directly in the main repo.
About the term "fork"
Traditionally, "fork" meant taking a project in a different direction permanently. On GitHub, a fork is typically used to make changes with the intention of merging them back into the original repo.
Key terminology to keep straight:
github.com/sqlfluff/sqlfluff)Forks must be kept in sync with the upstream repo periodically — we explain how below.
To work locally, you clone a repo — downloading a copy to your machine. Clone your fork (not the main repo) so you can push changes back to it:
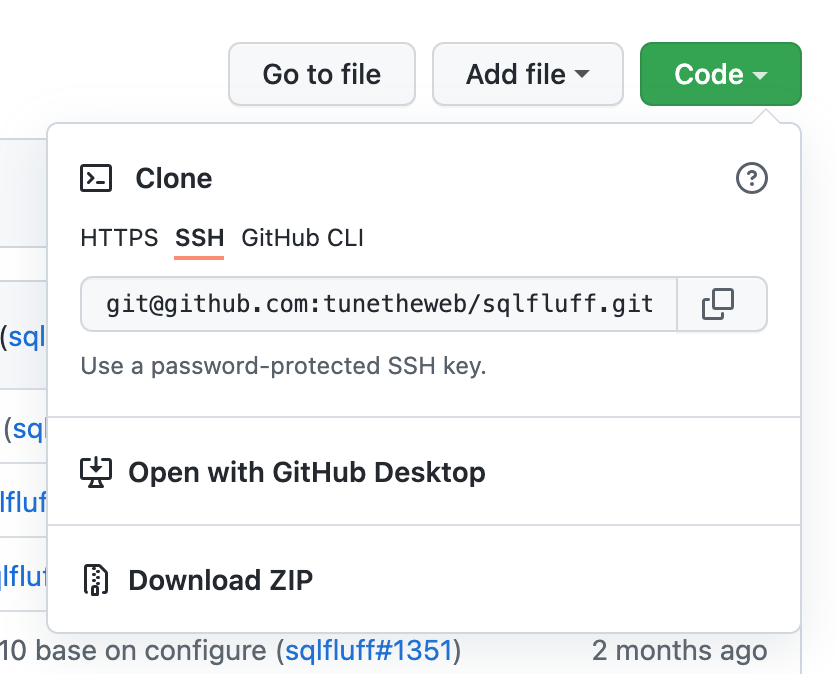
Options:
# SSH (recommended)
git clone git@github.com:YOUR_USERNAME/sqlfluff.git

# HTTPS
git clone https://github.com/YOUR_USERNAME/sqlfluff.gitWhen keeping copies in sync, you will inevitably encounter merge conflicts — when you and someone else have both changed the same line. Git flags these and asks you to resolve them manually. A conflicted file looks like this:
If you have questions, please
<<<<<<< HEAD
open an issue
=======
ask your question in Slack
>>>>>>> branch-a
To resolve: decide which version you want, delete the other version and all the <<<<, ====, and >>>> markers, then git add the resolved file.
Merge conflicts have a scary reputation but are usually straightforward to resolve. The best way to reduce them is to sync your branch with main frequently and keep PRs small and focused.
Click the Fork button on the SQLFluff GitHub page.
Clone your fork locally:
git clone git@github.com:YOUR_USERNAME/sqlfluff.git
cd sqlfluff
Add the upstream remote:
git remote add upstream git@github.com:sqlfluff/sqlfluff.gitIt is strongly recommended not to work directly on the main branch of your fork. Keep main clean so you can always create fresh branches from it.
To keep your fork's main in sync with upstream, the cleanest approach is a hard reset. This discards any changes you have on main — which should be none if you follow the advice above.
WARNING
Only do this if you have no in-flight changes on your main branch.
# Check what remotes you have
git remote -v

# Add upstream if not already added
git remote add upstream git@github.com:sqlfluff/sqlfluff.git

# Reset your main to match upstream exactly
git fetch upstream
git checkout main
git reset --hard upstream/main
git push origin main --force
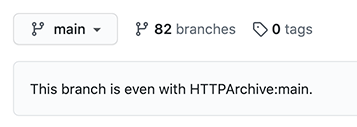
Afterwards, visit your fork on GitHub and confirm you see: "This branch is even with sqlfluff:main."
main to upstream (unless you just forked).main: git checkout maingit checkout -b postgres-create-tabletox commands.git add path/to/new/file.sqlgit commit -a -m "Add Postgres CREATE TABLE support"git push
# First push of a new branch needs:
git push --set-upstream origin postgres-create-tablegit pullBefore opening a PR — and periodically while working — merge changes from upstream main into your branch:
git fetch upstream
git merge upstream/main
git push
If there were merge conflicts, Git will pause and ask you to resolve them. Once you've resolved the conflicts and staged the affected files with git add, run git commit to complete the merge, then git push.
Git lets you work on several branches at once:
# Start feature1
git checkout main && git pull
git checkout -b feature1
# ... make commits ...
git push --set-upstream origin feature1

# Switch to a new branch while waiting for feedback on feature1
git checkout main && git pull
git checkout -b feature2
# ... make commits ...
git push --set-upstream origin feature2

# Come back to feature1
git checkout feature1
Use git status frequently to confirm which branch you're on and that all changes are committed before switching.
main changes since you branched.tox command).Closes #123 or Fixes #123 in the description — GitHub will close it automatically on merge. If it partially addresses an issue, use Makes progress on #123 instead.You can keep pushing to your branch after the PR is open — the PR updates automatically and checks rerun. There is no need to close and reopen.
Automated checks run first. A green tick means all checks passed; a red cross means something needs fixing. Look at the check details to understand what failed.
Merge conflict checks are done by GitHub itself. Keeping your branch synced with main before opening the PR minimises these.
Linting checks run automatically. You can replicate them locally with pre-commit run --all-files.
Code review feedback comes from a maintainer or contributor. Treat review as an opportunity to improve — it is not a personal criticism. If a reviewer makes a code suggestion directly on GitHub, you can accept it in one click (then git pull locally to get the changes). After addressing all feedback, re-request a review by clicking the icon next to the reviewer's name, or leave a comment to signal you're ready.
Draft pull requests
Open a draft PR early if you want feedback on your approach before finishing. Remember to convert to a full PR when ready.
We strongly encourage contributors to review pull requests — this is a collaborative effort and depending on one or two people creates a bottleneck.
Perfect is the enemy of good — an incremental improvement that can be merged is often better than waiting for the perfect solution.
GitHub Desktop is a Windows and macOS app that provides a visual interface for Git, reducing the need to use the command line.
First make sure you have Git installed (see Installing Git). Then download from https://desktop.github.com/ and follow the setup instructions including authenticating with GitHub and configuring your identity.
Follow Cloning a repository from GitHub to GitHub Desktop: go to your fork on GitHub and select Open with GitHub Desktop.
main and make sure main is up to date first.branch-name.Keep your fork's main in sync with upstream before creating any new branches (see Resyncing your main branch to upstream).
| Term | Definition |
|---|---|
| branch | An independent line of development within a repo. |
| clone | A local copy of a repo. |
| fetch | Download changes from a remote repo without merging them. |
| fork | A copy of a repo in your own GitHub account. |
| LGTM | "Looks Good To Me" — commonly used when approving a PR. |
| local | The copy of a repo on your machine. |
| main | The primary branch of the SQLFluff repo. |
| merge | Combining changes from one branch into another. |
| merge request | What GitLab calls a pull request. |
| origin | Your fork on GitHub (the remote your local clone pushes to). |
| pull | Fetch changes from a remote and merge them in one step. |
| pull request (PR) | A GitHub mechanism to propose and review a merge into the main repo. |
| push | Send local commits to a remote repo. |
| rebase | Reapply your commits on top of another branch's history. |
| repo / repository | A git project — a collection of versioned files. |
| upstream | The original SQLFluff repo that your fork was created from. |